

Most designers agree that accessibility is a crucial factor in creating user-friendly UX and UI design. Yet it's often the first thing to be deprioritised when resources and time are limited, since it seems more reasonable to focus on the majority of a product's target users. By doing that, we may exclude the world's largest minority group, the one billion people globally who experience a disability (opens in a new tab), and miss the universal benefits of making digital products accessible.
What is accessibility design?
Accessibility design means an equivalent experience for anyone, regardless of who they are and how they interact with products. Common practices include ensuring colour contrast, sizing touch areas properly and providing image and video captions.
Some of the most common accessibility issues users face with digital products:
- Visual impairments (e.g. colour blindness, low vision, blindness)
- Mobility impairments (physical disabilities)
- Auditory impairments (hearing difficulties)
People with these issues aren't necessarily part of the disabled demographic. Someone with a broken arm may not be able to use a mouse, and older people may have reduced vision that makes reading difficult.
Why is accessibility important in digital product design?
Accessibility has the potential to change how we create products and deliver content. It also improves usability for a much larger group of users, known as the Curb-Cut Effect (opens in a new tab). Closed captions, for example, are usually created for people with hearing impairments, but they also let anyone watch videos in a noisy place.
In some countries, accessibility is a legal requirement. Companies like Nike and Amazon have faced accessibility lawsuits (opens in a new tab) under the Americans with Disabilities Act (ADA) in the US. Europe has the European Accessibility Act (opens in a new tab), and in Hong Kong the Disability Discrimination Ordinance (Cap 487) (opens in a new tab) sets out the legal responsibility for accessible digital applications.
The good news is that global brands like Apple, IBM, Spotify and Decathlon are actively making their digital strategy accessible. Below are some practices we used at PALO IT that show accessibility design in action.
Applying accessibility design
The four principles of the Web Content Accessibility Guidelines (WCAG) (opens in a new tab) are the usual foundation:
- Perceivable: information can be perceived by at least one of a person's senses.
- Operable: interfaces can be operated through a variety of interactions.
- Understandable: interactions and information are understandable.
- Robust: content can be accessed through a variety of (assistive) technologies.
Principles are all well and good, so let's look at how they're implemented.
1. Ensure colour contrast for visual elements
Principle: perceivable. This benefits people with visual impairments like blindness, colour blindness or age-related low vision, and anyone using a product in strong light.
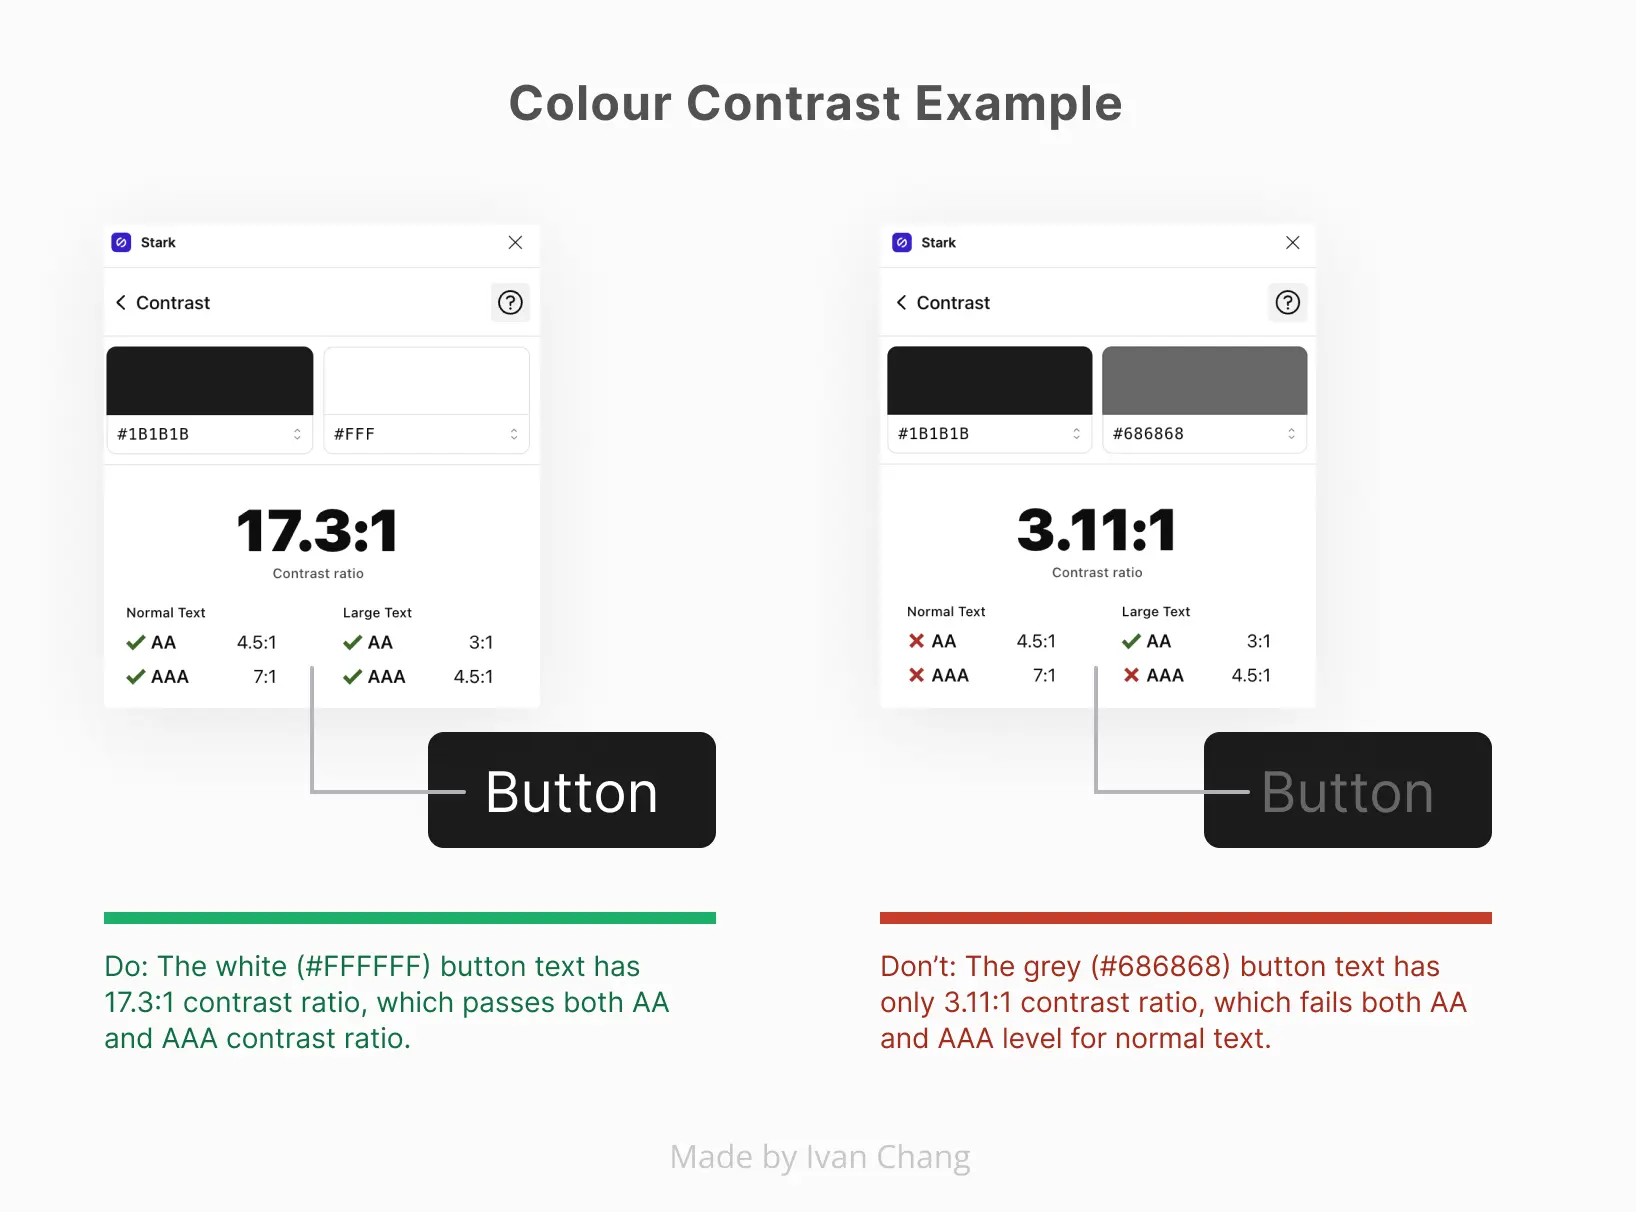
A minimum luminance contrast between visual elements and their adjacent colours (such as the background) keeps content readable. Font size and lighting also matter. The most common standard comes from WCAG, and tools like the Material Colour Tool (opens in a new tab) or the Stark Figma plugin (opens in a new tab) help apply it. You can also read the rationale for the ratios chosen (opens in a new tab).
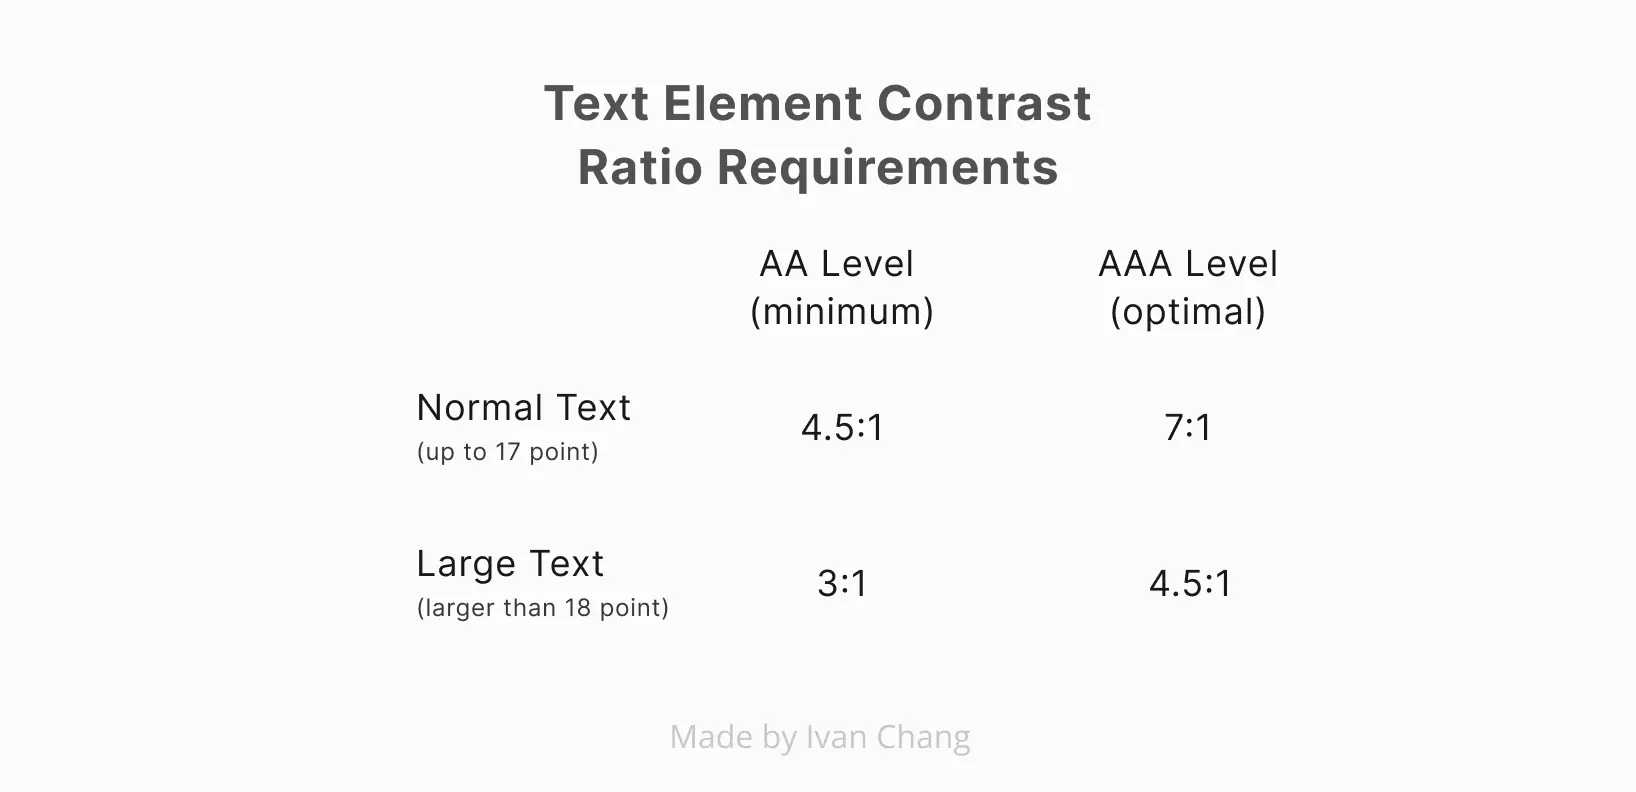 Contrast ratio requirements for text. People who can't access content at 7:1 usually rely on assistive technologies such as magnification.
For non-text elements, the contrast between a component's colour and its adjacent colour should pass 3:1. Legible focus indicators, for example, help keyboard users see which element is focused.
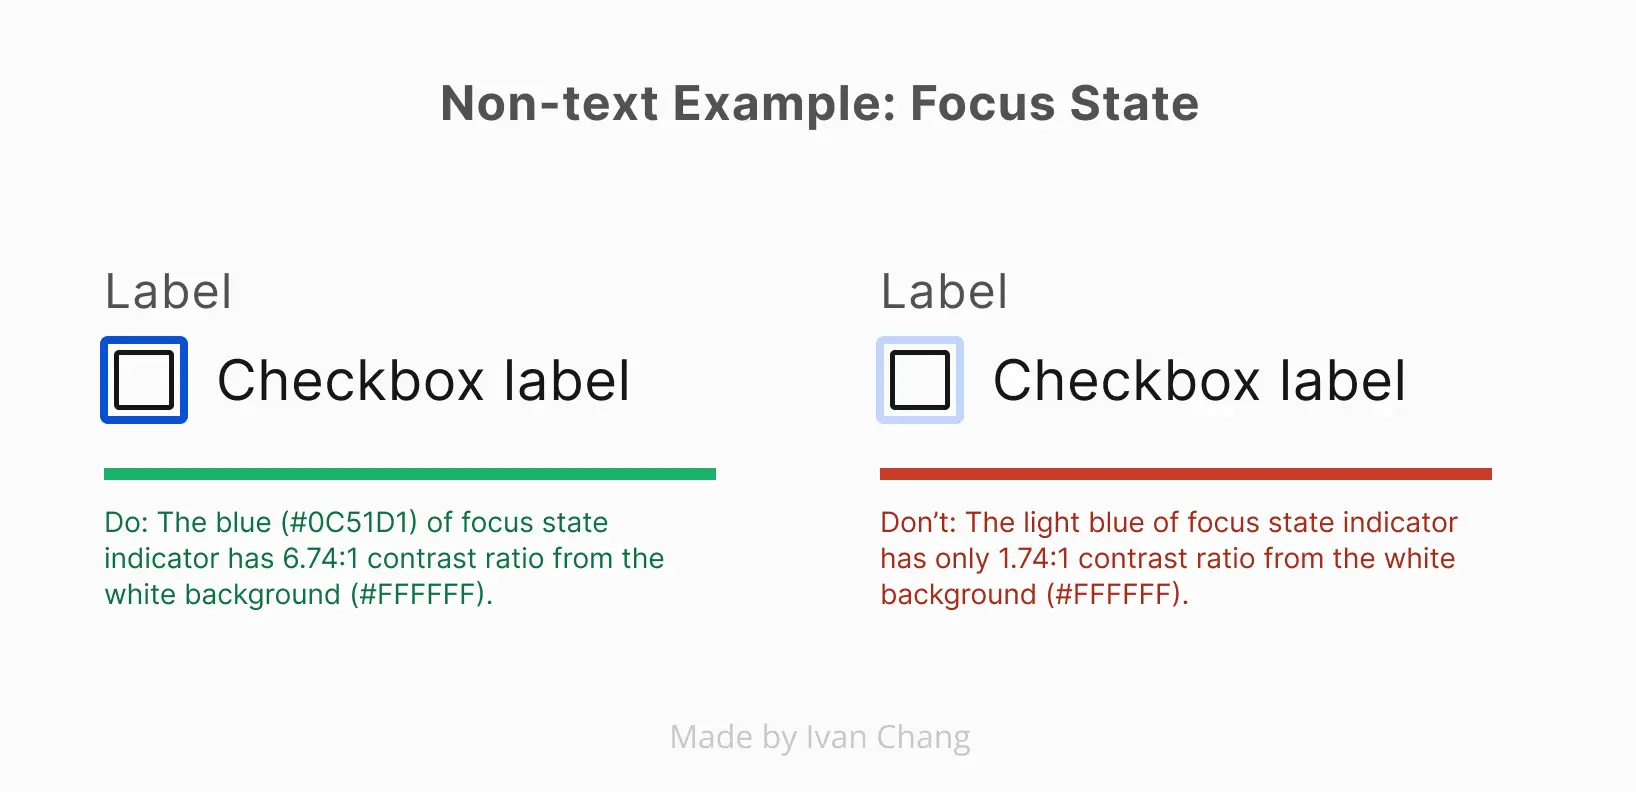 Legible focus indicators let keyboard users find the focused element easily.
Some situations don't require the minimum:
- In a multi-colour component, colours that don't affect identifying the component (e.g. a drop shadow) can be ignored.
- Logos.
- Incidental text in inactive or decorative elements (e.g. the label of a disabled button).
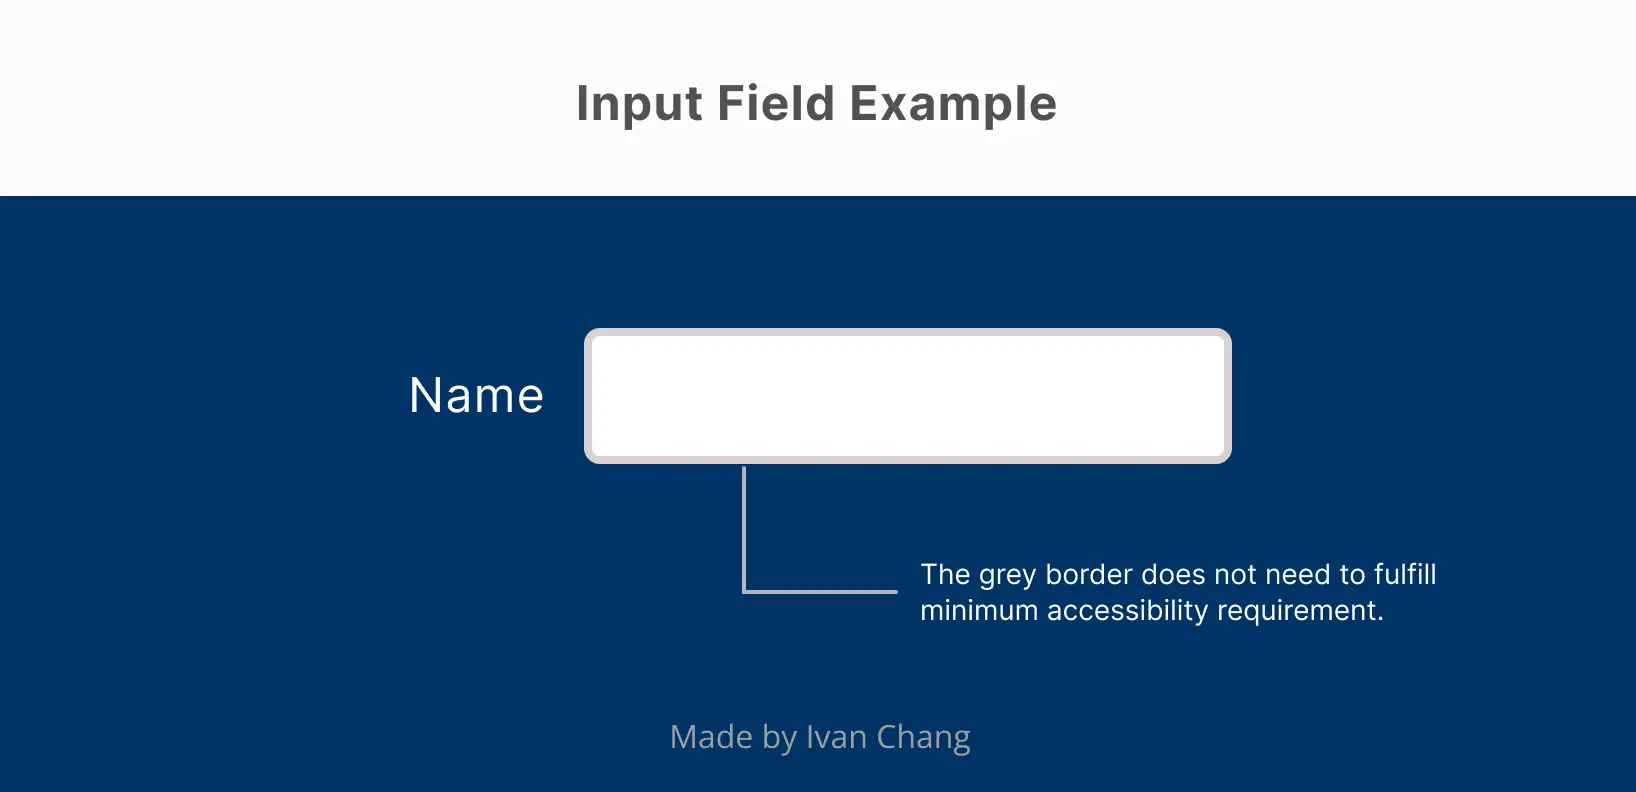 Only the contrast between the blue background and the input's white fill matters: the grey border doesn't affect identifying the component.
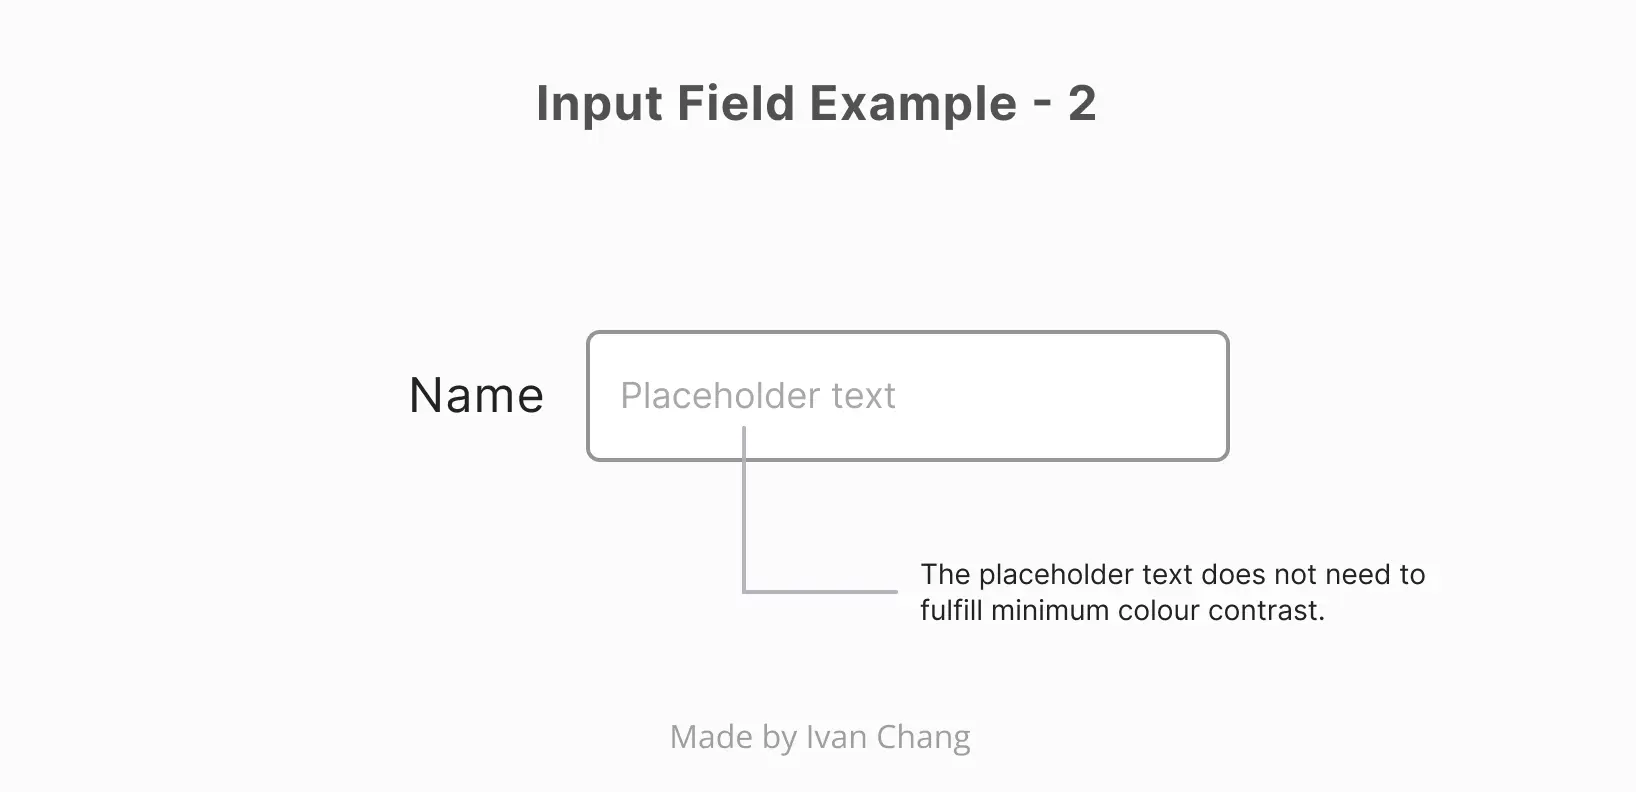 The placeholder text needn't meet the minimum contrast, since the field's border already signals the input.
Usage context, such as brand guidelines, also matters. Some examples from the industry:
- Spotify redesigning its most important buttons (opens in a new tab) with accessibility in mind
- Polishing GitLab's UI: a new colour system (opens in a new tab)
- Text, contrast and accessibility at Shopify (opens in a new tab)
2. Don't rely on colour alone to signify or separate information
Principles: perceivable and understandable. This benefits people with colour blindness.
Don't convey different information through colour alone. Additional cues such as text labels, glyph shapes or patterns make sure everyone can tell things apart.
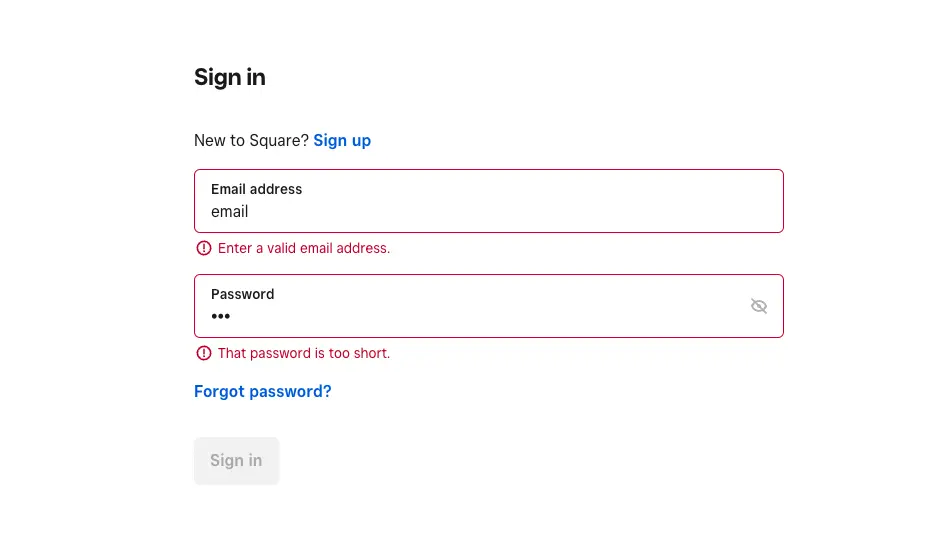 Square adds icons and helper messages to make an input field's error stand out.
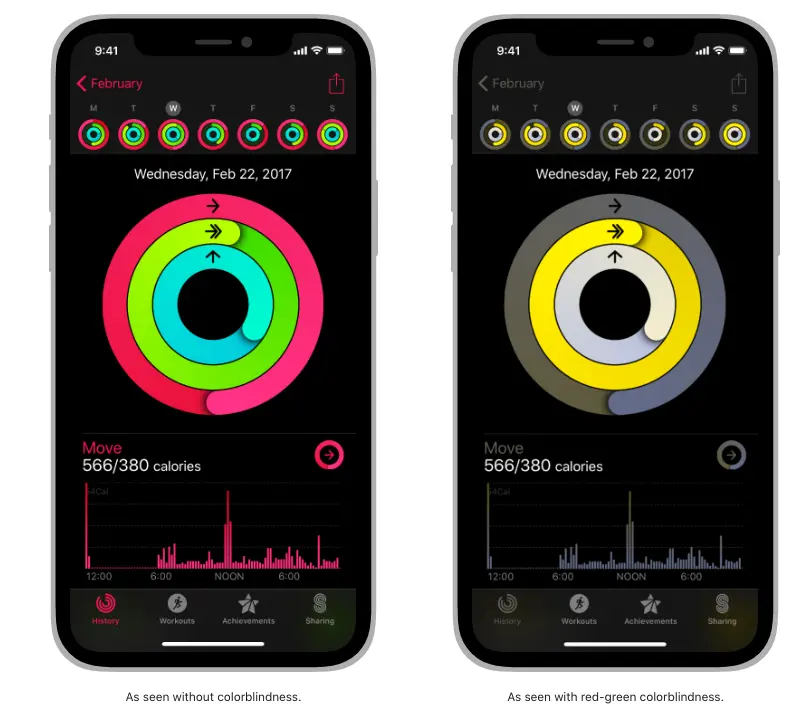 Apple adds icons to distinguish different data in a chart.
If possible, choose a colour-blind-friendly palette (opens in a new tab) before diving into the design.
3. Provide alternative text for images
Principles: operable and robust. This benefits people with serious visual impairments such as blindness, and site owners, since good alt text improves SEO.
Alternative text (alt text) describes images and other graphics with a short label in the code, so people who can't see them still understand what's shown through screen readers (e.g. VoiceOver on iOS, TalkBack on Android). It also appears when an image fails to load, and relevant keywords in alt text can help search engine optimisation.
A few reminders when writing alt text:
- Keep it short and simple.
- Don't repeat captions: screen readers read both.
- Decorative images don't need alt text.
- Functional images (e.g. logos, icon buttons) need alt text that explains their function.
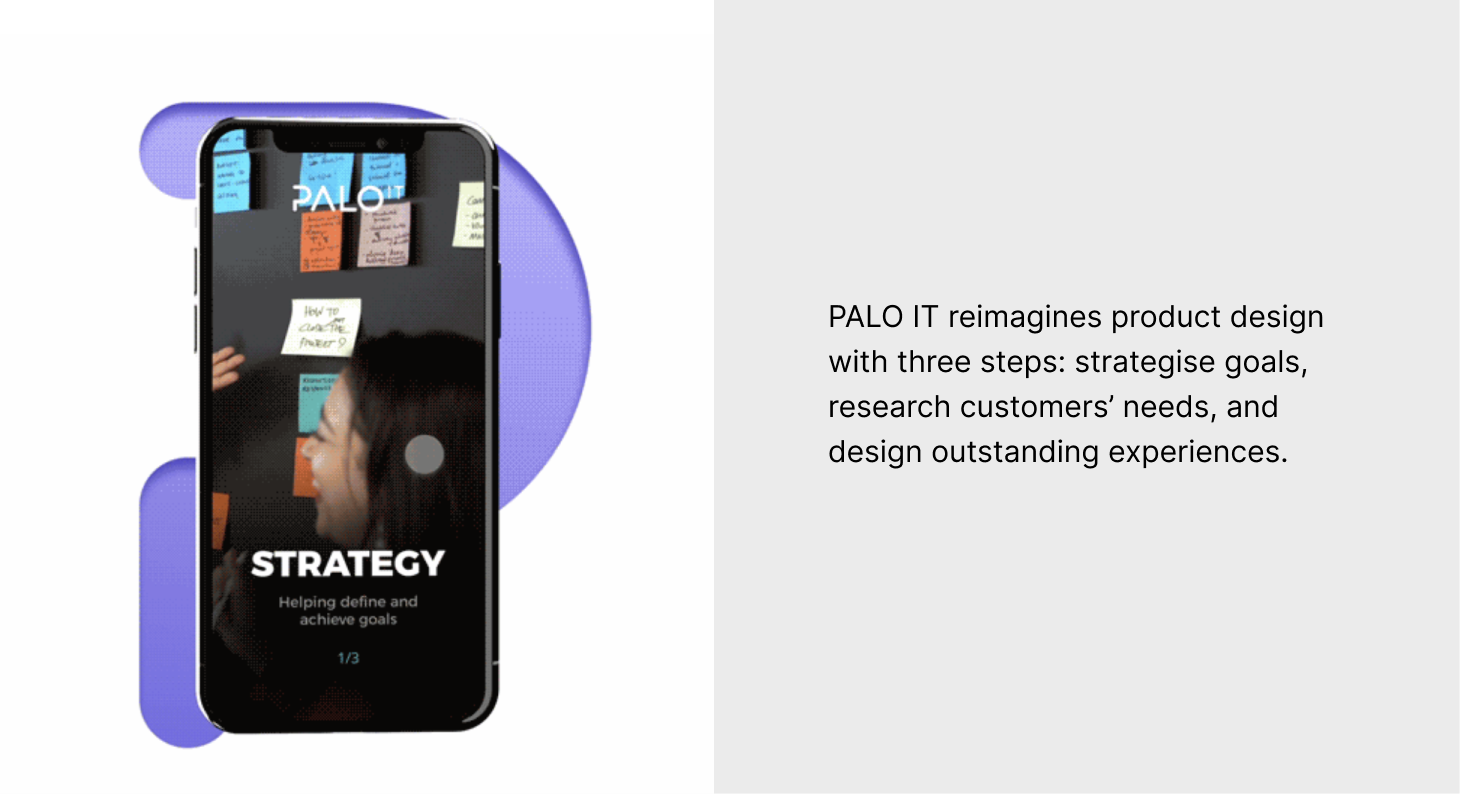 An example of good alt text from PALO IT.
A clear heading hierarchy also lets screen reader users navigate with ease. Indeed has published a helpful Figma toolkit (opens in a new tab) for applying one.
4. Enable keyboard accessibility
Principle: operable. This benefits:
- People with physical disabilities who can't use a mouse
- People with serious visual impairments who can't see the cursor
- People with chronic conditions that limit mouse use (e.g. repetitive strain injuries)
- Power users who prefer navigating with a keyboard
Keyboard accessibility lets people who rely on or prefer a keyboard interact with everything in a product (e.g. pressing Tab to move to the next element). They can navigate, complete the same tasks as mouse users and see where they are through focus indicators, which improves the experience for everyone.
It's also important to manage a logical, predictable focus order (opens in a new tab) that gives users a hierarchy as they move through content. The common practice is to match the visual flow: left to right, top to bottom.
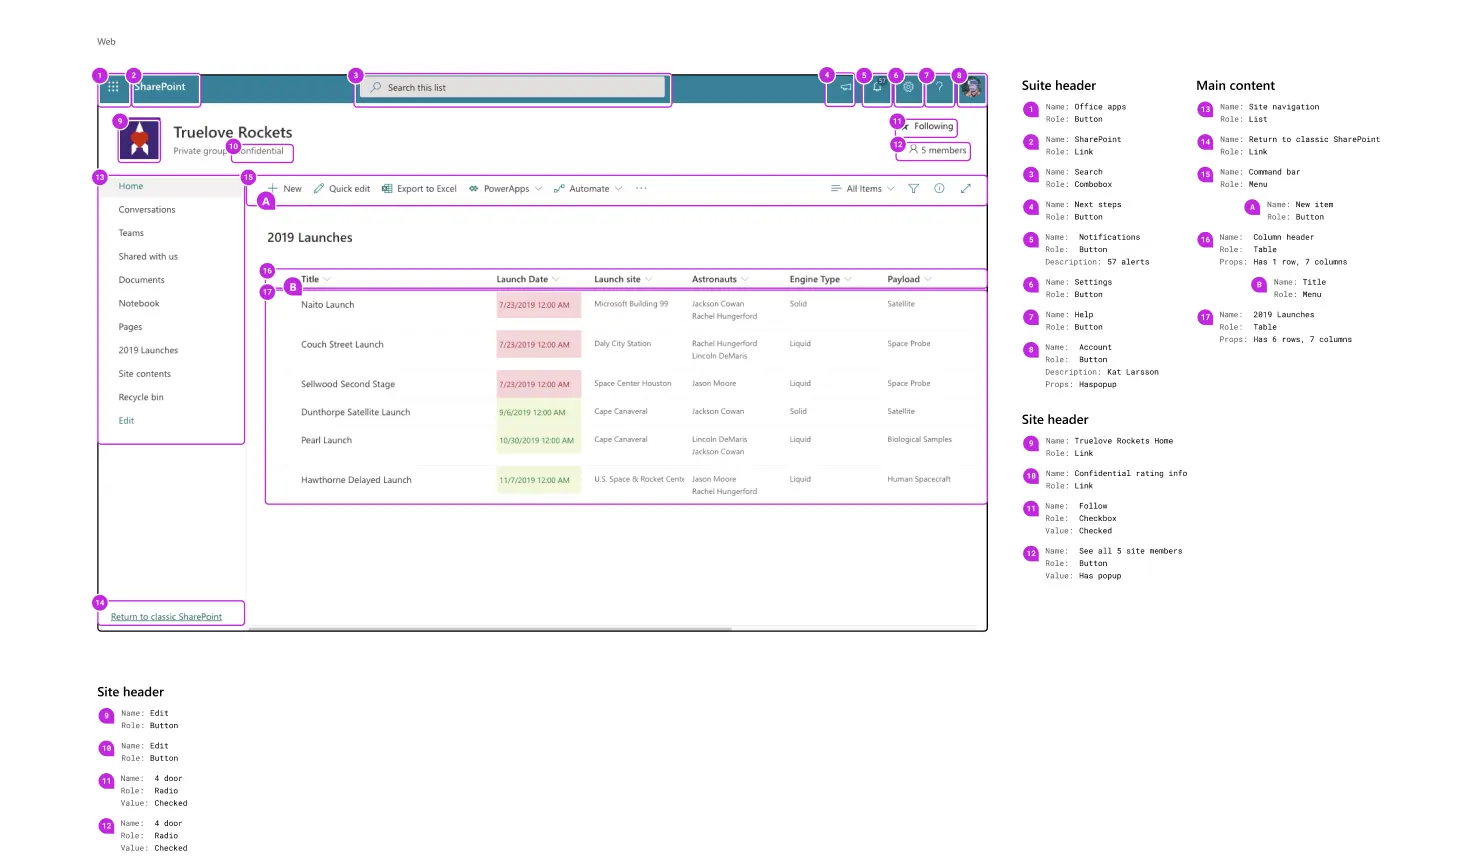 Focus order annotation in Microsoft's Fluent Design System.
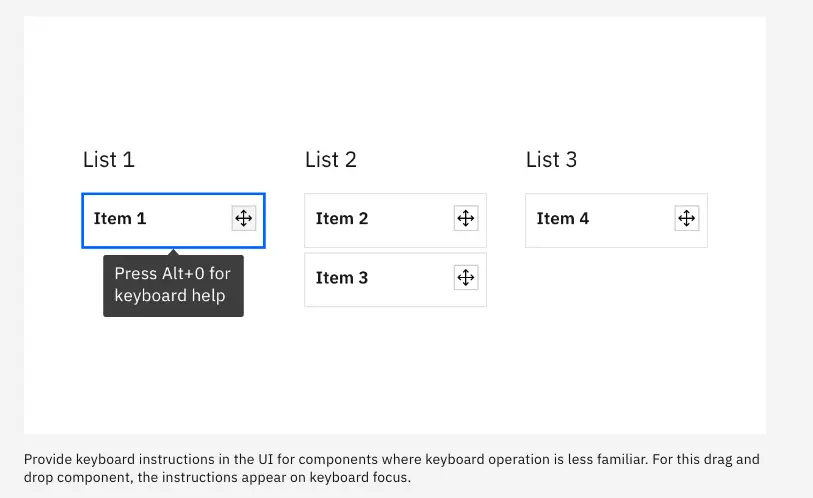 IBM's Carbon Design System shows keyboard instructions in a tooltip when a component has focus.
Many native web elements already have keyboard accessibility built in. MDN's guidelines (opens in a new tab) are a good starting point.
Conclusion
Accessibility design benefits people with disabilities, and it creates a better overall experience for every user. Every developer and designer, individuals and businesses alike, can start using that value in their products and services.
Design with accessibility, and you can't go wrong.